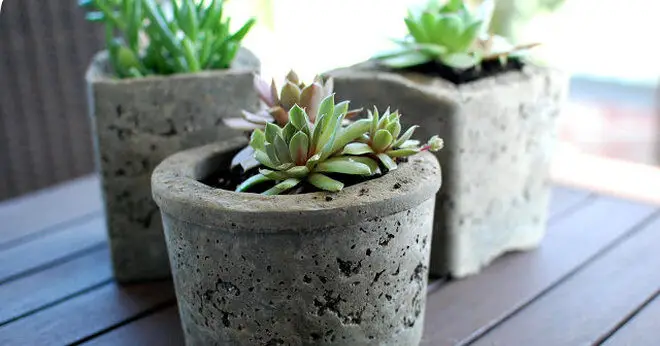
If at first glance you have the impression that working with cement is complex. This is not the case. All you need to know is what precautions to take to handle it correctly. Don’t be discouraged, with cement it does not require tedious preparation and it is very cheap. Get the necessary materials and off you go!
It is indeed quite possible to make cement in a plastic pot, however, it is advisable not to leave the pot around, the goal is in fact to make a cement pot, because of its weight, it will be much harder to spill.
Contents
Step-by-step explanations for pouring cement into a plastic pot
- Pour the cement into a container.
- Add a dose of water. It is necessary to mix ten doses of cement with one dose of water.
- Mix to obtain a homogeneous paste without lumps.
- Allow to stand for a few minutes.
- With a brush, brush the plastic mould with vegetable oil such as sunflower or rapeseed.
- Pour the cement into the mold.
- In the center, install the glass containing weight.
- Let dry for one day.
- Unmould carefully.
- Sand lightly with sandpaper to remove small defects in the cement.
How to make cement pots
1. The mould
The first thing you will need to create these beautiful raised beds is an exterior and interior mold. Both parts of the mold should have the same shape, but should be different sizes.
The lower part of the shell should fit perfectly with the larger one leaving about 2 inches of space between the two containers. This gap is then filled with cement and will allow you to determine the thickness of your pot. If you want to make a particularly large planting bucket with dimensions of more than 25 inches in height and width, make sure the thickness of the bucket is at least 3 inches.
You can also create molds by using two plastic pots for example. This way you can decide on the size and shape of the moulds. Glass, cardboard, cardboard, stainless steel or Styrofoam are also suitable to be used as molds.
2. Prepare the inside of the moulds
An important thing to remember when creating these jars is that it should be sprayed either with kerosene oil, sunflower oil, or any other lubricant.
It will be easier for you to release the cement from the original mold after setting. If you use a glass mold, be careful not to break it when extracting it.
3. Mix the cement
You should always protect your hands by mixing the cement with a good pair of gloves. To mix the cement you can use a bucket or wheelbarrow. The correct way to create this mixture is to add the cement into the bucket first, then gradually pour in water while stirring regularly.
It is best to consult the instructions on the packaging.
Before pouring the mixture into the mould, you can add pieces of glass, beads or any other decorative material. This will give a nice effect when finished. The only thing to remember is that the consistency of the cement must remain the same even after adding the decoration.
4. Pour
You must start by slowly pouring the cement mixture so that it covers the entire surface of the bottom. If you want to create a few holes for drainage you can place pebbles in the drill holes made earlier when creating the mold.
The next part is to smooth the cement surface with a spatula or masonry trowel. You must now place the inner mold into the larger one to create the sides. Make sure you press down well to adjust the thickness of the planter. The bottom and the sides of the vat must have the same thickness so that it does not break. However, a slightly thicker base will not make much difference.
Now pour the remaining cement between the two molds to fill the void. You can use a spatula or trowel to get rid of any air bubbles that may have formed. At the end smooth the upper part of the cement with the spatula.
5. Allow to dry
The next part requires a lot of patience. First you must leave the mould for at least 36 hours. You can also consult the details on the packaging to understand how long it will take for the cement to set.
Once the cement is dry, you should test it with a knife or corkscrew before unmolding. If you can penetrate the mold, then you must let it dry longer.
6. Unmould
When the cement is dry enough you can slowly start to take it out of the mold. Later, with the help of sandpaper you can rub the surface and give it a smooth finish.
Now the cement should be left to dry completely for a whole week. Once a day you should wipe the pot with a damp sponge or cloth until the color becomes darker. Once the pot has dried for more than two days you can drill holes to create drainage.
List of equipment used
Here is a list of items you will need:
-A bag of cement
-Kitchen or work gloves
Oil or any other paraffin-based lubricant
-A mould (plastic pot)
-Scissors
-A bucket or a wheelbarrow to mix
-Glass beads, shells or pebbles
-A film or plastic bag
Summary
Cement has its own charm and can last a very long time if it is integrated into our houses or gardens. A DIY (Do It Yourself) cement raised bed is a very suitable project for beginners because excellent results can be achieved by following a few simple steps.


