NOTE: The terms Wallflower and Erysimum are identical in this text; in reality, Erysimum is Wallflower’s biological word.
Wallflowers are easy to grow, fragrant, and make great additions to any garden. Their name comes from the fact that they have a habit of growing through silty cracks in brick or cement walls: Clearly, they are determined, hardy blooms.
Why does my Erysimum roots have rot?
Root rot on your Wallflower (Erysimum) can be dangerous if left untreated. In order to keep your plant alive, we strongly suggest that you follow our advice if the signs start to show: blackened and mushy roots.

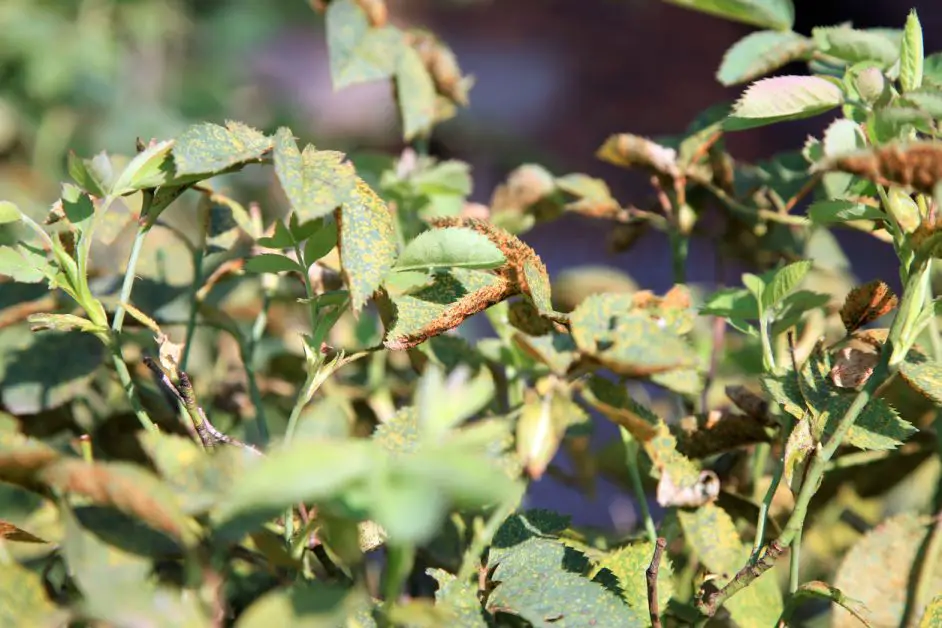
Why does my Wallflower have gray mold spots?
Gray mold spots are a specific fungus that regularly harms flowers and spreads swiftly. If you notice any brown (or gray) spots, this fungus is probably to cause. You risk your plant dying if you ignore these warning indications.
Our Solution
The answer is obvious once you recognize the cause of the problem. Most frequently, it results from the Erysimum being overwatered. We strongly advise you to remove the damaged plant parts, cut off the diseased roots and leaves, and then repot your plant in a new container with sterile potting soil.
Why does my Wallflower have leaf spots?
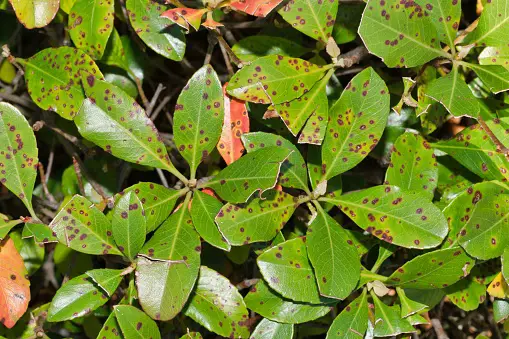 We provide you with all the information you need to identify and save your plants if they display signs like leaves that suddenly change color or wilt/droop. This sort of sickness is one of the most aggravating for Wallflower owners.
Why are my Wallflower leaves turning yellow?
This is probably the most common problem in the gardening world, yellowing leaves. There are 2 main reasons for this phenomenon, overwatering, or a lack of nutrients.
Reduce your watering frequency when you fear your plants are being overwatered, and follow these steps to determine whether they may be lacking in nutrients:
Each deficiency produces a different yellowing on the Erysimum in question, here’s how to spot them:
- Magnesium deficiency starts as yellow patches between leaf veins on older leaves. Veins stay green as yellow moves from the leaf center out. Leaf edges turn yellow last.
- Iron deficiency also shows as yellowing between leaf veins, but it hits young leaves on plant tops and branch tips first.
- Sulfur shortage first affects the youngest leaves, turning them entirely yellow.
- Potassium deficiency shows itself when leaf edges turn bright yellow, but the inner leaf stays green. Older leaves show symptoms first, and leaf edges soon turn brown.
- Nitrogen deficiency shows up as a general yellowing. Older, inner leaves turn yellow first. As it progresses, yellowing moves outward, eventually reaching young leaves, too.
Our Solution
According to the symptoms mentioned above, you just have to act accordingly. You can reduce your watering frequency, or fix a deficiency in Potassium, or Nitrogen, for that, you just have to buy a special soil for your deficiency, a consultant in a gardening store will know perfectly well how to inform you.
Is my Wallflower sunburned?
It is quite easy to find out if your Wallflower (Erysimum) has been burned by the sun. Just like on us, your plant will change color in this case, it will start to turn yellow or white.
As we saw above, if your Wallflower receives too much water or not enough light, the leaves may also change color.
However, there is a way to tell if it is sunburn; look at the bottom of the yellow leaves, the ones that have a shaded area closer to the root, if this area stays greener, it is probably sunburned, not something else.
Why are my Wallflower leaves turning brown?
A plant’s browning leaves are typically a symptom that it has been sunburned and has been exposed to excessive amounts of direct sunlight. Don’t worry; your plant probably won’t perish as a result, but its growth will be negatively impacted.
Should I leave my Erysimum in direct sunlight?
No! If your Erysimum (or Wallflower) has the symptoms described above, don’t leave it in direct sunlight, that’s the reason why your Wallflower is in such a state!
Our Solution
As stated in the paragraph above, the cure is straightforward: simply position your plant’s Wallflower so that it is out of direct sunlight. With proper watering and this method, your plant should quickly come back to life.
Why are my Erysimum leaves drooping or wilting ?
In most cases, this happens when your Erysimum lacks water. This is especially the case for large plants, naturally they need more water than others.
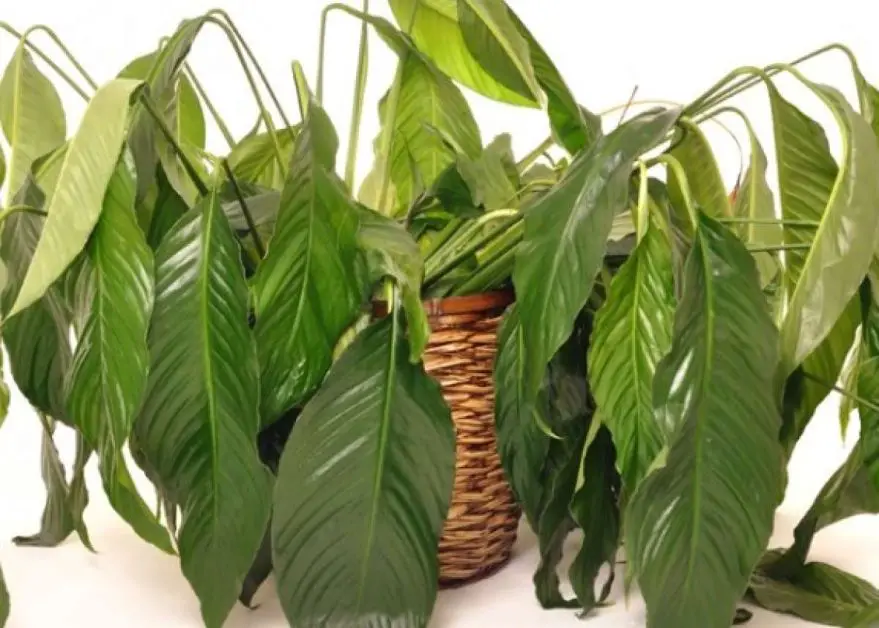
An easy way to know if your Erysimum is lacking water is to under-weigh its pot, if it looks light, it means that the soil and the roots are probably quite dry, and therefore need water!
Our Solution
If the soil in your plant’s pot is completely dry, you will need to start by moistening it so that the roots will also benefit from the water. A common mistake is to drown the Wallflower right after a dry period thinking that it needs a lot of water.
This is true, but the easiest way to end it is to give too much water at once. Instead, you should water the soil properly, returning to a peaceful watering rhythm.
Caring Tips for Erysimum
Water Occasionally
Your plant needs water to survive, but it’s crucial to balance the amount and timing of watering. As we previously mentioned, overwatering could be catastrophic for your Erysimum.
The best way to know if your plant needs water or not is to touch the soil, if you feel it is still wet, it is probably a good idea to wait a few more days.
Always keep temperatures stable
Maintaining a consistent temperature for your Erysimum is also a good idea, especially if it is kept indoors. At GreenShack, we typically advise reserving a temperature between 65 and 85 degrees F. Of course, avoid positioning your Erysimum close to air conditioners, radiators, or other sources of hot or cold air.
Keep your Wallflower Dust-Free
This one concerns indoor plants, just like on your furniture, dust is also deposited on the leaves of your indoor plants, the problem is that it can prevent them from receiving the necessary light, this would slow down (or even stop) the photosynthesis process, and eventually, they would lose their colors.
For your Wallflower, this would be a true descent into hell, and it would also appease the pests.
To remove the dust, gently rub the plant’s leaves with a microfiber cloth. Dust can be removed more easily with a damp cloth, but stay away from corrosive substances like rubbing alcohol!
Keep drainage in mind
If you have a tendency to overwater, you should be mindful of your drainage, and if they don’t already have them, we suggest selecting a saucer and a pot with drainage holes.
In the meantime, if you don’t have holes in your pots, you can add volcanic rocks (or any rocks with holes) at the bottom of your pot, this way it will create a channel so that the water doesn’t stay in your skin too much (to avoid that roots start to rot!)
