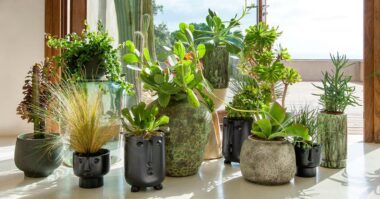
Have you fallen in love with the look of a large outdoor planter? Or maybe you’re looking for a large outdoor flower container to make the most of the space on your porch or deck?
Whatever it is, you definitely need to know all the pros and cons of these types of oversized containers. Weight is not the only issue.
Other factors such as the large amount of soil to be used, disturbed drainage, and the difficulty of moving the container could really spoil your fun. In most cases, these problems all have the same solution: the right kind of fill.
Contents
Why not use potting soil only?
Potting soil is heavy and could be expensive, especially in large quantities. Moreover, it is an absolute waste because the possibility that the roots of your plants do not reach it, is very real.
So how do you fill the bottom with a large planter to save money and reduce the weight of the pot? For your information, most plants to be grown in a large container don’t need all that much soil. Here’s how to fill the space without having to buy multiple bags of soil.
How do you properly fill the bottom with your large planter box?
Once you’re ready to plant, you’ll need to put in the filler first. Depending on the type of your container and its weight, you can choose between light or heavy loads.
If you prefer light loads, but are concerned about the planter tipping over, consider placing a heavy stone or brick at the bottom. Then add the light filler on top.
Be sure to make enough drainage holes in the bottom of the container before filling it. If there are not enough, water will not drain out, creating the risk of root rot.
What to fill your planter box with to keep it light?
If you want to keep your large outdoor flower planter box as light as possible, here is a list of the perfect materials to keep your container light.
Fortunately, some of these alternative suggestions can be recycled and reused, saving you money.
- Plastic milk jugs
- Laundry detergent containers
- Plastic water or soda bottles
- Contact lens solution bottles
- Protein powder containers
- Spilled plastic nursery pots
- Spilled aluminum cans
- Styrofoam packing peanuts – be sure to put them in a plastic bag before placing them in the bottom of the pot. Otherwise, they will get everywhere and be difficult to remove if you decide to repot your plant.
- Styrofoam blocks – again, it’s best to wrap them in a plastic bag so that the Styrofoam pieces don’t break down and get into the soil.
- Cut up pool noodles
What to fill your planter box with for a seasonal plant?
If you’re planning to plant a seasonal flower planter, it’s possible to use natural fillers that will decompose over time. By the time you replace your seasonal plantings, the filler will probably not decompose.
However, for long-term pots, organic fillers will break down by creating air pockets around the roots or by changing the pH of the soil. Some examples are:
- Leaves
- Branches
- Crumpled paper bags
- Newspaper
- Cardboard
- Pine cones
- Wood chips or mulch
What heavy fillers for your large outdoor flower pot?
To ensure that your large flower planter box doesn’t move at all, choose a heavy filler instead. This approach is especially if you live in a very windy area or are concerned about animals knocking over your container. Here are some examples to consider:
- Cinder block
- Bricks
- Large rocks
- Stumps or logs
- Broken ceramic pots
The importance of planter box drainage
Drainage plays an essential role in plant and root health. If the roots are constantly in contact with water, your plants may suffocate and not survive for long. The risk is even greater in winter, because it is difficult to control watering and the planter box can break under the effect of frost. This operation is therefore essential, whether for indoor or outdoor pots.
To ensure proper drainage, you will need to make sure that your pots have dedicated holes in the bottom. This way, excess water can drain away properly. Most pots already have holes in them. If they don’t, you’ll need to create a large one or several smaller ones. Keep in mind, however, that drilling is not suitable for concrete or ceramic pots, which may break.
The best option is to choose a planter box with a water reservoir, for which drilling is not necessary because it already has a double bottom, which prevents the roots from being in constant contact with the water. This type of planter box also offers a certain autonomy to the plants during the summer. You can then leave for a week with peace of mind.
And to suck up the excess water, put a saucer slightly larger than the diameter of the planter box at the bottom, about 1 inch. You can also raise the container slightly.
Clogging
Over time, the drainage layer you put in the bottom of the planter box may settle and clog. Putting a layer of gravel in the potting soil will then be useless, as it will no longer be able to drain the water.
The flowerpot should be emptied completely and rinsed. You can then install a brand-new drainage bed and fresh potting soil. The new layer should be of a thicker texture.
With this roadmap, you now know how to go about filling your flower pots properly. Keep in mind that potted plants require more care, as they are not naturally grown in the ground, especially when planted in a different climate than their natural habitat. So, you’ll need to be thorough.
