Adding stones, pebbles, and potsherds to the bottom of planters to improve drainage in potted plants is so 1980’s – and it does not work as well as this quick and easy, counterintuitive solution.
In my grandmother’s day, and to some extent today some gardeners are divided in opinion on whether adding pebbles is better than adding potsherds. It was an epic battle similar to evolutionists versus creationists.
Well, we hate to disappoint the old schoolers but the correct answer is neither one works as well as leaving them out completely.
This is how to improve drainage and potted plants quickly and easily.
- 1. Do not pot them with pebbles and stones in the bottom.
- 2. Use deeper containers if possible.
- 3. Pay attention to the type of soil or medium you are using and make sure it is rated for good drainage.
Contents
Do not use pebbles, stones and broken pot pieces in the bottom of containers
Research has shown that if you use a shallow pot or shallow soil profile (a pot only half full of soil), the other half stones you actually get less drainage and it will hold more water for longer.
This may seem counterintuitive. It only makes sense to think that the large pebbles, stones or shards will create more space between them then there is between the particles of soil. So it “should” drain faster.
That is not the case. No matter how much space there is between the pebbles and stones they can only allow the water to pass that the soil will give up. They cannot suck the water away out of the soil.
We need to get the water out the drain hole in the bottom of the pot as fast as possible. That is the object of the exercise for plants that need fast draining soil.
In certain cases, holding more water in the soil for a longer period of time may be beneficial. However, if you’re looking for good drainage in soil for particular types of plants, leave out the pebbles, stones, and clay pot pieces.
The answer is not in the pebbles, and clay pot pieces added to the bottom of pots, but rather in the depth of soil itself. The forces you want to harness for better drainage is gravity and pressure.
Water will not drain out of the pot until always completely saturated. Soil acts like a sponge. That water won’t go anywhere until the soil is completely saturated.
Are you confused yet?
Sorry, it isn’t our intention to give you a course on physics. The fact of the matter is the solution seems to be a little bit counter-intuitive. Please watch the video below to see a demonstration of the principles we have discussed.
Use deeper pots
We have already established that the water won’t go anywhere until the soil is reached at saturation point. Gravity and pressure will pull the water down to the lower parts of the soil.
If you have put stones and rocks etc. in the bottom of your pot, what you are essentially doing is raising the bottom of the soil closer to the roots of the plant. They are much more likely to be sitting inside soggy soil when in fact what they really crave is good drainage.
If the pot you are using is deeper or there are no pebbles and so forth in the bottom. You have increased the distance from the bottom of the soil where the water will settle from the root system.
In a nutshell, pebbles and stones in the bottom of the pot raise the bottom of the soggy soil closer to your plants.
Now, of course once that water has settled through the soil into the bottom of the pot you need to have holes in the pot so the water will escape out the bottom. Some people believe that stones and pebbles will keep the soil in the pot and keep it from leaking all over the place.
Look for put with feet or nubs that raise the bottom of the pot slightly off the ground so the holes don’t get clogged. Some pot designs actually have very small feet built in, maybe more to stop them sitting in water than to stop soil clogging them.
Here’s a tip:
Simply cut a piece of old screen and put it inside the pot over the drainage holes, before you add the soil. The screen will hold the soil in and let the water out. If you don’t have any old screen handy, a coffee filter will work also.
Pay attention to the type of soil or medium you are using in the first place
I promised you quick and easy solutions to plant pot drainage. Here is the answer – use the proper potting soil to begin with. No, I’m not being a wise guy I’m being serious.
Buying potting soil is not the place to cheap out. Use a high quality potting mixture that clearly stated to drain well. It may cost a little more, but it will pay off big time.
If you want to save some money in do-it-yourself here is the recipe for a great all-around growing medium. I borrowed this recipe from Mel Bartholomew and his book Square Foot Gardening:
Do it yourself all purpose gardening medium:
- 1/3 Peat moss
- 1/3 Vermiculite (perlite will work)
- 1/3 Blended compost – it must be a mixture, not all one type. You May have to mix your own from bags of this and that.
Easy peasey right?
He goes on to state:
“All three of these ingredients are natural, not manufactured. They all drain well so there are no puddles to waterlogged the plant roots; but they also hold large amounts of moisture so the plants will grow well. This mixture is a pleasure to work with, it has a light fluffy texture and smells good.”
Okay, we have discussed at length the concept of not using pebbles and stones in the bottom of pots. So, as we stated before, the counterintuitive solution is to use more soil in distance, not less.
The trick is that water will flow through different soils at different rates. If you have a plant that requires good drainage, you don’t want it sitting in soggy soil. Important thing to think about now is the density of the soil.
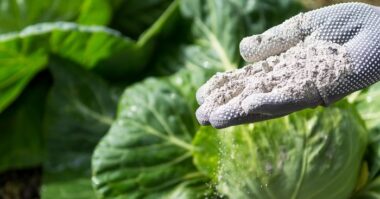
If you want to increase the drainage of any soil mix it with perlite. Perlite may be a little difficult to find, I found it at the second garden center I visited. Or you can order perlite on Amazon for a great price.
The properties of perlite that were most after our fact that it creates spaces within the soil for water to flow. It decreases the density of the soil and lowers its resistance to water flow.
Perlite is a volcanic material which is most often formed from obsidian rock. Before it is cooked, it has a fairly high water content. But when perlite is heated it expands to 8 to 16 times its original size and creates minute air bubbles and takes on a bright white color.
The small pores holds moisture, and the larger pores allow for drainage and lighten up the soil. Adding soil on perlite does not crush it.
There is no nutrient value in the perlite itself, it is not plant food but rather a soil amendment that creates a lighter soil with better water flow.
If you really must use pebbles in a potted plants, try them on top
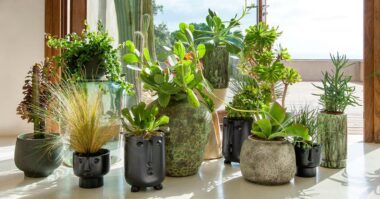
It’s probably a safe bet that you have seen succulents and cactus in garden stores in small containers with pebbles on top. They make a cute decoration. They also disperse the water when you are watering the plant.
Did you know that you could also use pebbles as the top layer in plant containers for different aesthetic looks? We are not talking about a couple of inches worth of rock as some sort of part of the growing mixture. This is simply for decoration.
It is a really inexpensive way to change the look of your plants. Maybe you can tie it into your room decor or even use it as an accent.
What type of pebbles are we talking about?
Many garden centers sell a product called pearl stone. It is primarily used as a top cover and can add a level of protection and beauty to terrarium’s, indoor gardens, and potted houseplants. From us aesthetic point of view, they add color, texture, and variety to houseplants.
Another product you might want to look into is called horticultural or Alpine grit. It is easy to find in cheap. It also is sorted in different sizes.
The only thing limiting you from having a fashion forward looking pot is your own imagination.
How to create well-drained soil in pots ?
Holes in the bottom of the pot
Most planters and garden pots have drainage holes in the bottom to allow water to drain away. This is especially true for earthen pots. Check for a hole when buying a new planter. If you have a pot without a drainage hole, you must drill a large hole or several small ones in the bottom of your garden planter to allow for this drainage. Check for a hole when buying a new planter, especially if you are repotting.
How to make soil drain better in pots ?
A drainage bed at the bottom of the pot
Here are a few tips for good drainage in any container. You should devote about 20% of your planter’s volume to drainage. In order to make a suitable drainage bed, you can put a layer of gravel, pot shards or clay balls. You must then cover this level (your layer of clay balls or shards) with potting soil and fertilizer.
The drained substrate, which may also contain sand, should always be suitable for the plants you wish to repot. You can then place the root ball of your green or flowering plant in the potting soil, cover it with this soil and press it down properly, before watering it with water.
Conclusion
I hope we have succeeded in meeting your expectations by providing tips and tricks on improving drainage in your plant pots.
We hope you enjoyed “How To Improve Drainage In Potted Plants Quickly And Easily”.
We wish you the best in your gardening adventures.
